
Train Your Brain For Stronger Sketches
...and the confidence that comes with that

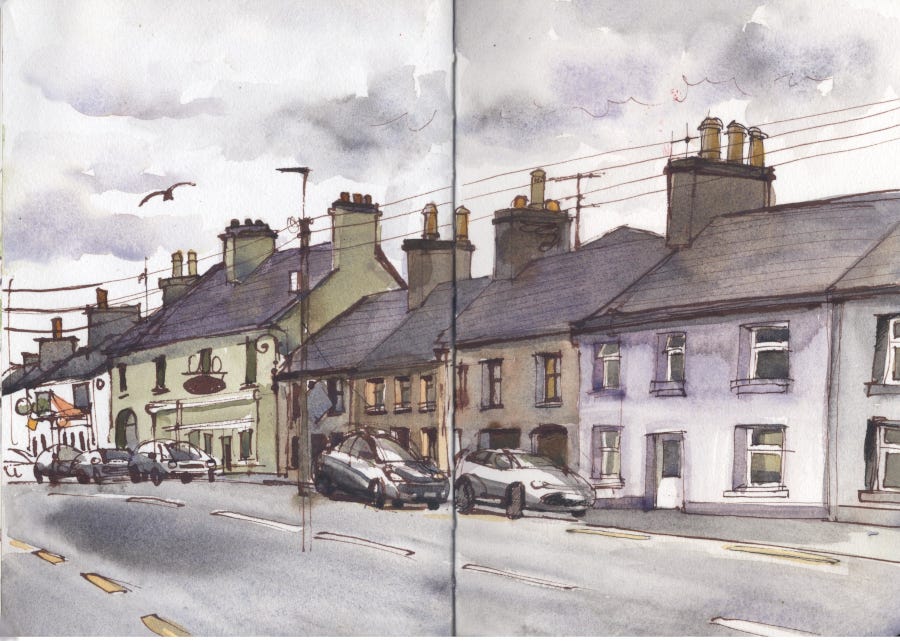
I have taught numerous classes on “my” way for sketching scenes with tight perspective, and it isn’t the way it’s normally taught. No doubt those trained as architects and architectural draughtsmen would come out in hives if they observed me teaching - but that’s just it, I am neither of those things, I am an artist. That means I follow my whim (muse, caprice, creative urge) and am also allergic to structure, despite being much happier when structure is imposed on me.
My students have produced strong, believable sketches using this method, with strong, believable buildings receding into the distance. I just realised I missed a trick, something that will make the urban sketcher’s receding buildings (and anything else they’re sketching from life) look much better.
So I will list the stages I use when I am sketching buildings in a row, and I will highlight the step I should have included in class, but didn’t:
Identify the (rough) centre of the composition you want to make. Do this in your mind, or with the point of a pen or pencil.
Match that to the centre of your sheet of paper, or the centre of your sketchbook (I will push it to the left or right of the central gutter, so that it doesn’t get in the way). Again, in your mind, or with a dot.
Decide how big you’re going to need to paint the first element so that you can fit all the bits you want to fit on the page. I work in an A5 sketchbook so my double page spread is A4 / 270mm X 210mm / 8” X 11”.
Using a colour that won’t look out of place for your subject, make a very dilute wash of it (it only needs to be just about visible to you), draw your shapes with a nice pointy brush - I use an R13 by Rosemary and Co. That’s a round, about an 8 to 10. Wash away mistakes before the paint dries. Even if it does dry, the paint should be so dilute you won’t notice it when later colours are added. If it's in sunlight, do NOT paint any more than the merest breath of a line in dilute watercolour, because you need to keep those whites white.
To make your shapes, only do a small shape at a time - no “guesstimating” long lines - and never stray too far from the shape you have just made. That way, you can more accurately judge the size and shape of the next element, as you will be drawing it (with your brush) in proportion to the shape right next to it.
Judge the slopes of your sloping lines. Be as honest as possible. Concentrate. We always tend to make them less sloping than they are. Hold your sheet up and compare it to your subject. Ask yourself, “if this sloping line was one of the hands of a clock, what time would it say?” That’s a good way to jolt yourself into seeing clearly.
Next, draw (with your brush) the slope of the eaves of the roof.
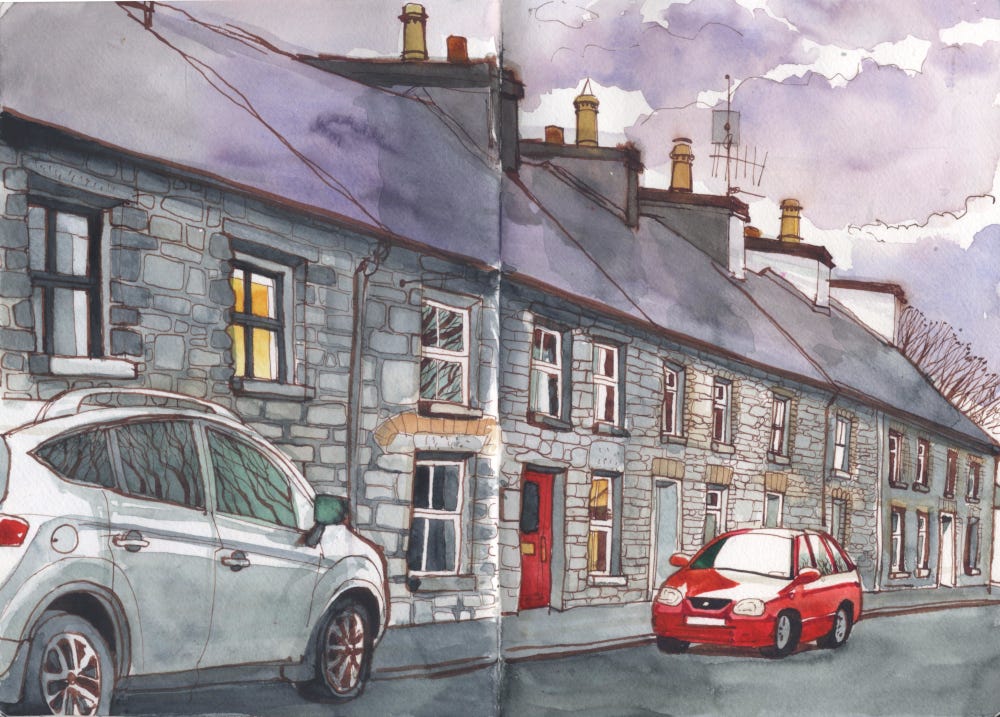
Here’s the bit I missed: before dividing up the roof into sections, add the windows. Because we’re so used to placing them vertically below the corresponding element on the roof (eg. chimney, roof window) we are at risk of placing them incorrectly when seeing them from the side. A good way to mitigate that is to place the windows in relation to those roof elements, thus: “the middle window is directly under that chimney when seen from this angle”. Do this with your brush, in dilute watercolour. Wash it away if you make a mistake. Appraise your drawing before continuing. Glance rapidly from your sketch to the subject to make sure you’re still on the right track.
Now you can add the pitch of the roof or the dividing lines between sections. Watch how you are surprised by just how slanting those sloping lines are.
When it all looks strong and solid, jump in with pen and ink.
This is, of course, just the beginning, and there are many more elements to get right before you are in the clear.
But while I have presented these few steps as a means to make strong perspective, actually, it’s much more than that: it relies on good observation for success.
What’s so good about good observation?
Good observation is a habit you develop as a sketcher. It’s a brain-training thing.
Good observation means you can make a beautiful portrait that speaks of the soul of the sitter.
It means you can capture reflections that shimmer on water, and foliage bathed in sunlight or moody on a cloudy day.
It requires your brain to be active and honest, not lazy and self-indulgent. But that’s a good thing: it raises your art game.
It takes time, and we all know (and loathe) how it feels to make a bad drawing. That’s why the watercolour-first technique is so useful, in which you get to wash away wrong lines. Don’t use a pencil, that’s frustrating and messy, and you won’t have the same easy flowing lines that a brush makes.
I hope you find this makes a big difference to your “perspective” drawings, and in turn, to your art practice in general. You can see this in action on some of my YouTube videos, and there’ll be lots more where they came from.
“But I’m not into representational art”
Mastering observational sketching in pen and ink will open up your creativity in ways you never dreamed possible, because once you are an absolute master there’s nothing you can’t do - and you are freed up to do other things. Do you think a piano player was trained to hit any old key? Or have they been trained to play so masterfully that getting the keys in the wrong place just isn’t a possibility? Or the tennis ace - did they just fire a ball randomly to get to the point at which they never miss? Art is no different. Becoming a master does in no way hinder your free expression and creativity: rather, it clears the way for it to flourish.
My experience as a teacher has told me that artists tend to get in their own way - they are much, much more capable than they believe. You just need to smooth out all those wobbles before you can speed, and you will.
And then comes confidence, and then you can throw out the rule book, or not, as you choose, because you’ll be doing your own thing and loving it and the world can say what it likes.
But start the journey: take the first step and explore the path to mastery.
It’s probably more fun to do than look at, but of course that’s true of jazz, whatever the audience’s reaction.
Some great new tips and a lot of reminders, which are equally welcome. Thanks Róisín! I love things like “Watch how you are surprised by just how slanting those sloping lines are”. Always! Even when you’re expecting it they can still surprise, especially any gutters etc nearly overhead. It’s the sort of thing I love finding from proper observation. Over the last few years I’ve been allowing myself a little more freedom from pure representation... but as you say it stems much easier from knowing what it “should” look like first! (I think of it as my “jazz improvisational sketching” using all the correct elements but not necessarily in the right order! I also use it sparingly.)